Deploy sentinel analytic rules with bicep and PowerShell


Introduction
Managing a Microsoft Sentinel environment can get very complex, especially when you are responsible for managing multiple environments as MSSPs do. This is why Infrastructure as Code becomes very important. It makes sure that your environments are consistent, easy to roll out, and modular since you can standardize certain configurations over multiple customers.
In this post, I will be talking about how I managed to roll out Microsoft Sentinel analytic rules using Bicep and PowerShell. I used PowerShell so I was able to deploy analytic rules based on the data connectors that were enabled in the customer environments.
The problem
When you are an MSSP and want to manage multiple customers consistently, you will quickly find out that using IaC is the only option you have. A couple of issues I discovered when using the portal can be found in this section.
Manually enabling analytic rules takes a long time
For example, when you are onboarding a new customer and are connecting a data connector, you will want to enable the Out-Of-The-Box analytic rules regarding this data connector. To do this, you will have to go to analytic rules and filter on the data connector you just connected.
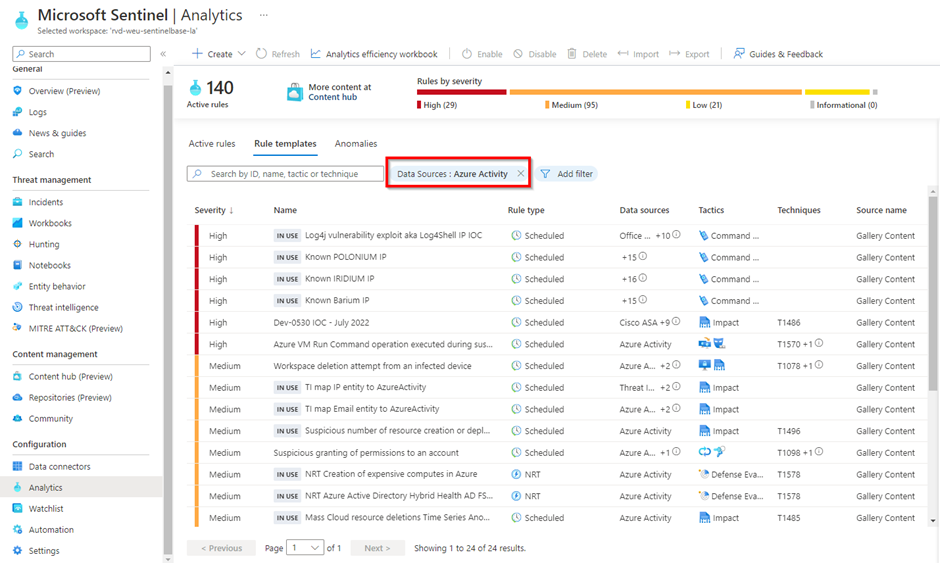
Once you have done this, you need to click on each analytic rule, go to the 'review and create page', and create the analytic rule. If Azure has a good day, the portal refreshes after about three seconds and the rule is created. Know that Azure can sometimes be a lot slower, which makes the waiting process sometimes frustrating. After testing this process a couple of times, I found out that enabling one analytic rule costs you four clicks and about 25 seconds. This means that for a data connector like the Azure Activity where 24 Out Of The Box rules are available, you will have to click 96 times in the portal and need about 600 seconds (10 minutes). If you have an environment where 200 analytic rules are enabled, this would take 800 clicks and 5000 seconds (83 minutes). If you would use IaC to deploy these analytic rules, all of the analytic rules would get rolled out in a matter of minutes. And even better, you can get a coffee while you are waiting on the deployment to finish.
Not all of the out-of-the-box rules are good
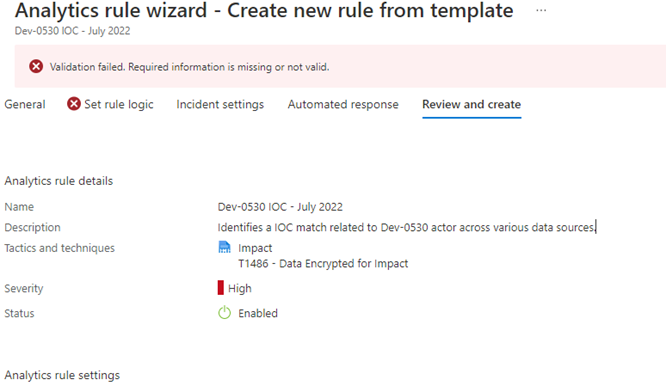
When you try to enable a couple of analytic rules, you will find out that not all analytic rules are working correctly. Some analytic rules have incorrect entity mappings, incorrect queries, or just don’t fit your customer's needs. Below you find for example the Out Of The Box rule called ‘Dev-0530 IOC – July 2022’ which fails to validate for as long as I know the rule. In this case, it is because of the incorrect query mapping.
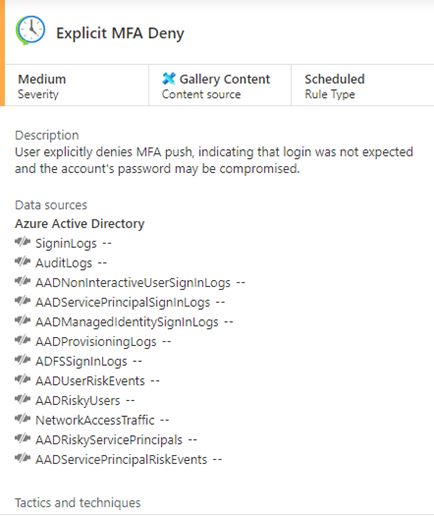
Another example is the ‘Explicit MFA Deny’ rule. This rule creates an incident when a user clicks on the deny button in their authenticator app instead of clicking the approve button. In a lot of environments, you will find out that this will generate a lot of false positives. This is why you probably want to set a threshold, where an incident is only created when a user does this multiple times in a certain time frame.
You are probably wondering how IaC is going to fix this issue. If you make these changes all the time in multiple environments, it would be much more efficient if you make this change once, describe it as a template, and deploy this template for every customer that wants to use this rule. This way customers have all of the fine-tuning you already did as an MSSP at the very beginning of the Sentinel setup. If you fail to do this, you probably have a lot of false positives in a new deployment that you already encountered in other customer environments.
Keeping track of changes is a pain in the **s
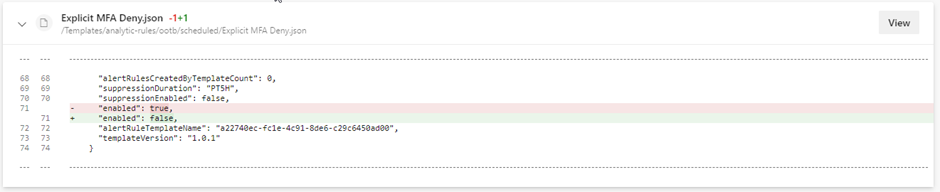
When fine-tuning analytic rules in the portal, it is very hard to keep track of which analytic rules have custom fine-tuning, when you did it, and what changed compared to the older version. When you use IaC and couple a GitHub or Azure DevOps repository to your project, you have much easier tracking of which rules are changed and what is changed. You are also able to organize your content like you want, making it easy to find analytic rules that are finetuned for one specific customer for example.
Many more
There are many more reasons why you would want to migrate your analytic rules to a DevOps environment:
- Creating approval flows using pipelines
- Do additional analytic rule checking before deployment
- Creating conditions when deploying analytic rules
- Using a custom auto-update script
- Auto-deploy all analytic rules based on data connector
How I did it
To be honest, I was not able to deploy sentinel analytic rules in the way I wanted just by using bicep. I created a PowerShell script that generates bicep parameter files based on the customer's needs and used those parameter files as input to my bicep scripts. The functional diagram of the code can be found below:
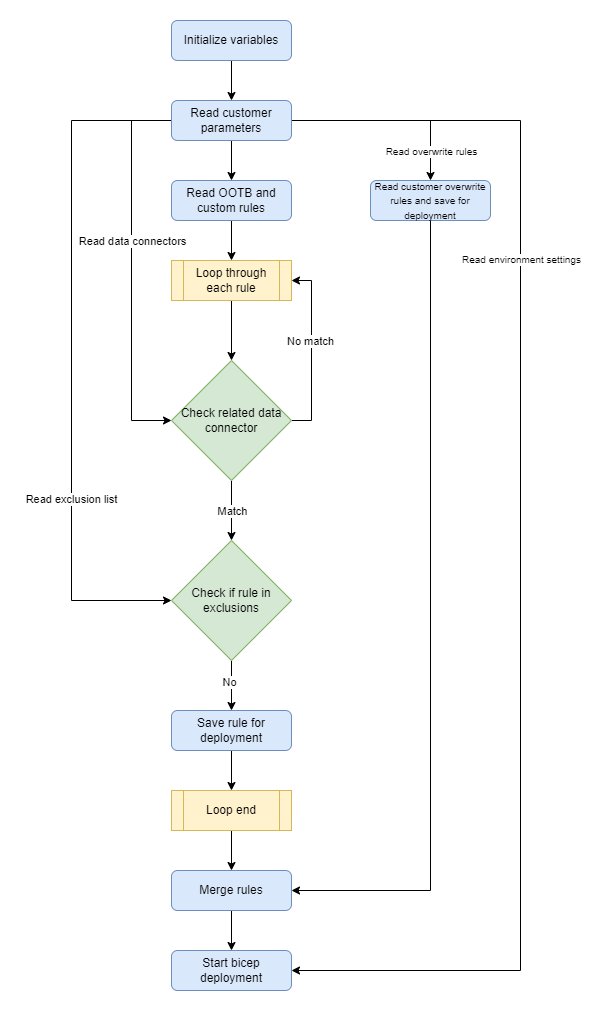
The PowerShell script makes sure that based on the data connector the customer has, all the related analytic rules are rolled out. In some cases, certain analytic rules don’t need to be deployed although there is a related data connector, which is why we use an exclusion file. The overwrites file will contain analytic rules that have customer-specific finetuning.
Customer parameters
I defined a couple of customer-specific parameters that are needed for the deployment. These are:
- resourcegroupName – Resource group of Sentinel workspace
- workspaceName – Sentinel workspace name
- overwritesPath – This is the path to the folder that contains all the overwrite rules of a customer.
- rulesParameterFile – The file that contains the data connectors the customer has
- ruleExclusionsFile – The file that contains rule IDs that do not need to be deployed
- location – The location of the bicep deployment
All these parameters are expected in the script to be able to start the deployment.
Rules Parameter File
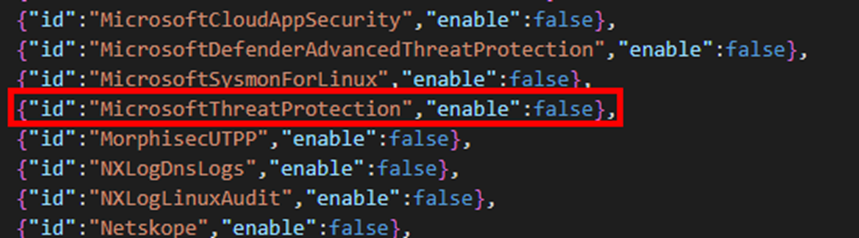
The Rule Parameter File is a customer-specific file that contains all of the possible data connectors together with a property that shows if the data connector is enabled. It is a JSON Array with multiple JSON Objects, that I have built in the following schema:
[
    {“id”:”dataconnector1”,”enable”:true},
    {“id”:”dataconnector2”,”enable”:false},
    …
]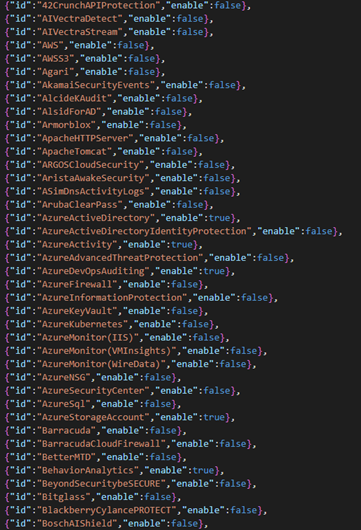
I based the creation of this file on the following GitHub page: https://github.com/Azure/Azure-Sentinel/blob/master/.script/tests/detectionTemplateSchemaValidation/ValidConnectorIds.json . Here you can find all of the valid connector ids that are in Sentinel.
Rule Exclusion File
The Rule Exclusion File is a file that contains the analytic rule names (in fact, these are GUID ids but more on that later) that should not be deployed, even though it contains the data connector ids that the customer uses in their environment.
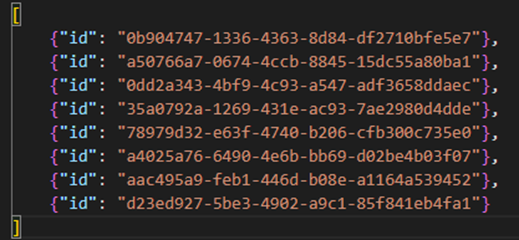
This was needed since we want to deploy analytic rules that are based on the Threat Intelligence data connector. There are a couple of rules related to this connector, that also query tables of data connectors a customer does not need. Since all analytic rules are tested and validated before deployment, analytic rules with non-existing tables forced the deployment to fail. To solve this, we add the analytic rule names that do not need to be deployed in this file.
Overwrites Path
In the overwrites path we store all of the analytic rules that contain customer-specific finetuning. By default, our script will deploy all out-of-the-box analytic rules that are present. When an analytic rule needs specific finetuning, we place them in this overwrite path and deploy these rules after the OOTB deployments. It is important to note that the name of the analytic rules need to be the same in the OOTB path and the Overwrites path for the rule to be overwritten. More on how to do this is described in the following chapters.
Analytic rule properties
We talked a couple of times about the path where OOTB rules and Overwrite rules are kept. But how are analytic rules described and what format are they in?
When you export an analytic rule via the Azure portal, you will find out that the analytic rule is described in JSON format. If you have some experience with ARM, you will even notice that it is in fact an ARM template!
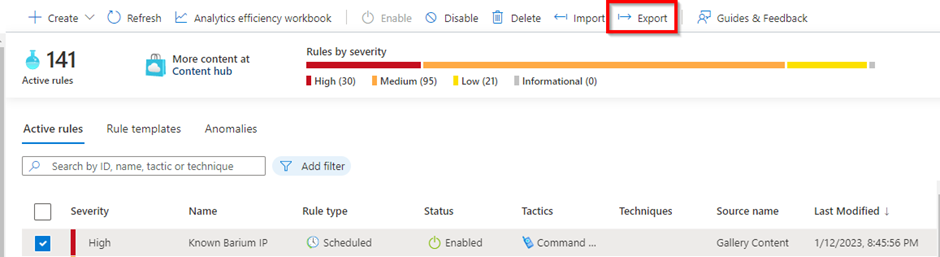
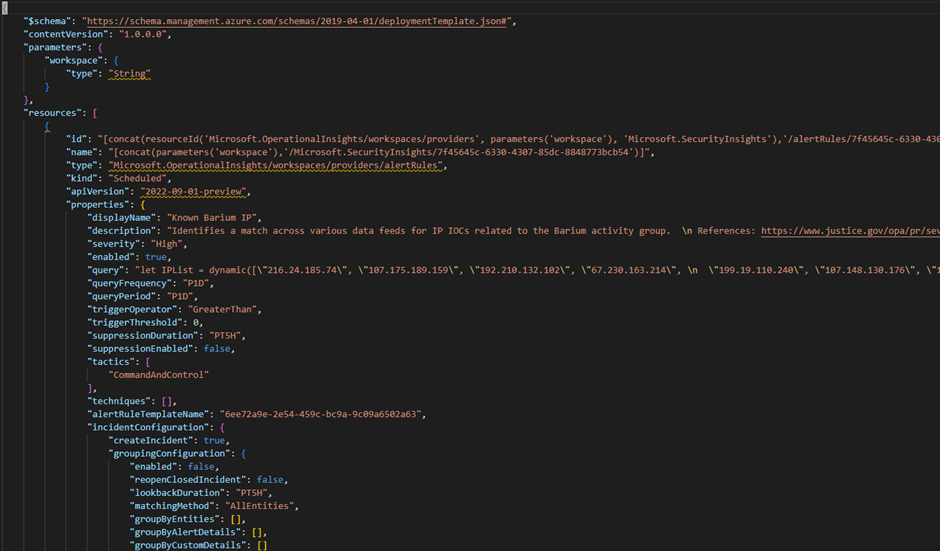
You can see in the template above that the ARM template has a property called “resources”. This is a JSON Array that contains all of the exported analytic rules you selected in the Azure Portal. Each JSON object in this array is the JSON representation of an analytic rule, which means you eventually only need these JSON Objects.
Now that you have a JSON export of the analytic rules, it is time to take a look at a couple of properties. There are a lot of properties used to describe an analytic rule. There in fact too much to talk about. If you want to learn more about all of the properties, you can visit the SecurityInsights alert rules documentation. However, below you will find an explanation of the most important analytic rule properties.
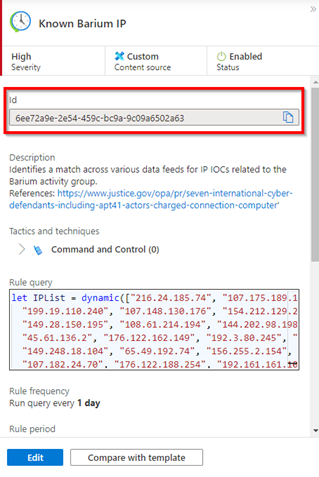
- Id – The ID field is not really used during a bicep deployment of the analytic rule. It just forms the unique ID together with your subscription and workspace when you export the rule to an ARM template. You can ignore this property.
- Name – The name field is a GUID and is the name of your analytic rule. It is unique in a Sentinel workspace. When you deploy an analytic rule to your environment where there is already a rule with the same name, the analytic rule will be overwritten. You can also find the name of the analytic rule in the ‘id’ field in the Azure Portal (I know, pretty complex right)

- alertRuleTemplateName – This property contains the name of the template on which the analytic rule is based. This is not a required property, since you can always create custom analytic rules from scratch. This field will be important if you want to track analytic rule versions with the latest template version.

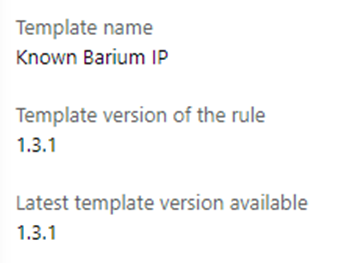
- templateVersion – The template version field contains the version of the template on which the analytic rule is based. When this version is lower than the latest version existing for the template, the analytic rule will get the ‘update available’ tag.

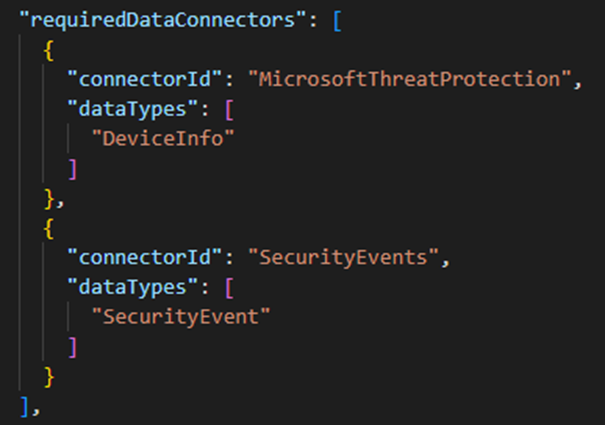
- requiredDataConnectors – This property is an array that contains JSON objects regarding the data connectors the analytic rule uses. These objects contains the connectorId field, and the dataTypes field. The connectorId field is the field that we check to see if an analytic rule needs to be deployed for a customer, which means that these are the fields that are present in our Rules Parameter File!
All the other properties that can be found in the analytic rule template are the same properties you can find in the portal. Again, if you want more information about the other properties, I recommend checking the SecurityInsights alert rules documentation.
Bicep code
Assuming you already know something about bicep, you can probably imagine that we need two bicep files to deploy analytic rules. One bicep file is scoped at subscription level, the other file is scoped at the resource group that contains the Sentinel log analytics workspace. I named the first bicep file main.bicep, and the second bicep file deploy-rules.bicep.
Az-Context
Before you can start deploying bicep, you first need the set your environment for the deployment. You can use the Connect-AzAccount PowerShell command to log in to your tenant and choose the subscription where your sentinel environment resides.
main.bicep
The main.bicep file is the file that gets started by the deployment. In this file we do a couple of steps, which are the following:
- Get the required parameters
a. Resource group name
b. Sentinel workspace name - Read the analytic rules JSON files via the loadJsonContent function (these are the files with the analytic rule properties in JSON that you should generate via powershell)
- Set the target scope to subscription level
- Get the existing resource group of the sentinel workspace
- Deploy the OOTB analytic rules (a reference to deploy-rules.bicep)
- Deploy the Overwrite analytic rules (a reference to deploy-rules.bicep)
The command that is used to start this file is
New-AzSubscriptionDeployment -TemplateFile "main.bicep" -TemplateParameterFile ".\deployments\params.json" -Location $location -VerboseThis command will start the main.bicep file, with a file params.json as parameter file. The parameter file contains the parameters that we set in step 1, which are the resource group and sentinel workspace name. If you build a PowerShell script like I did to start the bicep deployment, this file should be generated in your PowerShell script (you can set the sentinel workspace and resource group name as required parameters in PowerShell).
$bicepParameterFile = @"
    {
        "`$schema": "https://schema.management.azure.com/schemas/2015-01-01/deploymentParameters.json#",
        "contentVersion": "1.0.0.0",
        "parameters": {
            "resourceGroupName": {
                "value": "$resourcegroupName"
            },
            "workspaceName": {
                "value": "$workspaceName"
            }
        }
    }
"@
$bicepParameterFile | Out-File ".\deployments\params.json"
deploy-rules.bicep
The deploy-rules.bicep file is eventually the file where analytic rules get deployed. Below you find the steps of the bicep file:
- We first read the parameters for the deployment
a. Sentinel workspace name
b. Analytic rules in array format - Get the existing sentinel workspace by providing the workspace name
- Deploying the analytic rules by using a for-loop. Here we can get the required properties for every rule which are
a. Name
b. Kind
c. Properties (the object that contains the analytic rule properties)
Get current out of the box analytic rules
Below you will find a script that gets all of the out-of-the-box analytic rules. The script expects the resource group name of your sentinel workspace and the name of the log analytics workspace. It then created a bearer token based on your az-context parameters (so make sure your context is correct). In the next step, the script gets all the template rules by using the Azure Management API and adds the required properties that are needed for a bicep deployment for each analytic rule (the properties of a template analytic rule are not the same as the properties you find in an exported existing analytic rule). Finally, the script saves the analytic rules in JSON format in different folders based on the alert rule types.